
Notice
Recent Posts
Recent Comments
Link
| 일 | 월 | 화 | 수 | 목 | 금 | 토 |
|---|---|---|---|---|---|---|
| 1 | 2 | 3 | 4 | 5 | 6 | 7 |
| 8 | 9 | 10 | 11 | 12 | 13 | 14 |
| 15 | 16 | 17 | 18 | 19 | 20 | 21 |
| 22 | 23 | 24 | 25 | 26 | 27 | 28 |
| 29 | 30 |
Tags
- angular route
- angular button
- 옵저버블
- 호버
- modal
- 스크롤 이벤트 감지
- egov spring ajax 사용 예시
- summary
- 검색
- 앵귤러 모달
- 셀렉트박스 커스텀
- 아이오닉 스크롤 이벤트
- 스크롤 이벤트
- angular modal
- 모달
- route
- scroll
- flex-1
- Oracle LISTAGG 사용 예시
- prisma
- Ionic modal
- Angular Router
- formgroup
- 앵귤러 애니메이션
- mysql if
- angular animation
- TAILWIND
- ApexChart
- ajax 사용 예시
- Router
Archives
- Today
- Total
깜놀하는 해므찌로
Ion Scroll listen 활용 예시 / RxJS observable service 본문
반응형
SMALL

1. 스크롤을 감지하여 현재 페이지의 위치에 맞게 aside 뷰를 수정해봅시다.
  <ion-content
    style="width: 100%"
    [scrollEvents]="true"
    (ionScroll)="ionScroll($event)"
  >
  </ion-content>
2. (Layout-page) 스크롤 감지를 위해 ion-content 태그에 scrollEvent 속성에 true 설정 및 ionScroll 이벤트 메소드를 선언합니다.
import { ScrollService } from '../../services/scroll.service';

constructor(private scrollService: ScrollService) {}

ionScroll(ev: any) {
    this.scrollService.next(ev.detail.currentY);
  }
3. 스크롤 이벤트 발생 시 현재 Y 축 위치를 가져옵니다.

npx nx generate service --project client services/scroll4. 스크롤 서비스를 cli 를 통해 생성합니다.
import { Injectable } from '@angular/core';
import { Observable, Subject } from 'rxjs';

@Injectable({
  providedIn: 'root',
})
export class ScrollService {
  private subject = new Subject<number>();
  public scrollY$: Observable<number>;

  constructor() {
    this.scrollY$ = this.subject.asObservable();
  }

  next(scrollY: number) {
    this.subject.next(scrollY);
  }
}
5. 서비스 페이지
6. Y축 위치를 옵저버블로 전달하기 위해 Observable, Subject 로드
7. Subject : 초기값이 필요할 때, Observable : default value 가 필요 없을 시 사용
8. next 메소드를 생성한 후 파라미터로 받은 값을 next 메소드를 사용하여 바로 전달합니다.
import {
Component,
HostBinding,
OnInit,
HostListener,
ViewChild,
AfterViewInit,
ElementRef,
} from '@angular/core';
import { CommonModule } from '@angular/common';
import { Index1Section } from './index1/index1.section';
import { Index2Section } from './index2/index2.section';
import { Index3Section } from './index3/index3.section';
import { Index4Section } from './index4/index4.section';
import { Index5Section } from './index5/index5.section';
import { Index6Section } from './index6/index6.section';
import { Index7Section } from './index7/index7.section';
import { Index8Section } from './index8/index8.section';
import { Index9Section } from './index9/index9.section'; // 1~9 섹션 로드
import { IconComponent } from '../../components/icon/icon.component';
import { ScrollService } from '../../services/scroll.service';
@Component({
selector: 'app-index',
templateUrl: './index.page.html',
styleUrls: ['./index.page.scss'],
standalone: true,
imports: [
IconComponent,
CommonModule,
Index1Section,
Index2Section,
Index3Section,
Index4Section,
Index5Section,
Index6Section,
Index7Section,
Index8Section,
Index9Section,
],
})
export class IndexPage implements OnInit, AfterViewInit {
// 모든 섹션을 핸들링하기 위해 ViewChild 선언
// read: ElementRef => dom 객체로 읽기 위해 선언
// static: true => 변경이 감지되기 전에 실행 true
@ViewChild(Index1Section, { read: ElementRef, static: true })
section1!: ElementRef;
@ViewChild(Index2Section, { read: ElementRef, static: true })
section2!: ElementRef;
@ViewChild(Index3Section, { read: ElementRef, static: true })
section3!: ElementRef;
@ViewChild(Index4Section, { read: ElementRef, static: true })
section4!: ElementRef;
@ViewChild(Index5Section, { read: ElementRef, static: true })
section5!: ElementRef;
@ViewChild(Index6Section, { read: ElementRef, static: true })
section6!: ElementRef;
@ViewChild(Index7Section, { read: ElementRef, static: true })
section7!: ElementRef;
@ViewChild(Index8Section, { read: ElementRef, static: true })
section8!: ElementRef;
@ViewChild(Index9Section, { read: ElementRef, static: true })
section9!: ElementRef;
// 현재 섹션
visibleSection: ElementRef | undefined;
// 현재 섹션 default : 0 번째 할당
visibleIndex: number = 0;
// 스크롤이 감지되면 true 변경, 기본 false 설정
isActivatedScroll: boolean = false;
// 스크롤 서비스 의존성 주입
constructor(private scrollService: ScrollService) {}
ngOnInit() {}
// 템플릿 로드가 완료된 시점에서 로직 구현
ngAfterViewInit(): void {
// viewChild 배열 선언
const sections = [
this.section1,
this.section2,
this.section3,
this.section4,
this.section5,
this.section6,
this.section7,
this.section8,
this.section9,
];
// 서비스의 scrollY$ 값 구독 시작
this.scrollService.getScrollY().subscribe({
next: (scrollY) => {
// scrollY : 전송받은 데이터 변수 (변수명은 맘대로~)
const index = sections.findIndex((section) => {
// section 이 있을 때에만 비주얼 감지 메소드 호출
if (section) {
return this.checkVisible(section.nativeElement);
} else {
return null;
}
});
// index를 찾았을 경우에만 현재 열린 페이지 index 할당
if (index !== -1) {
this.visibleIndex = index;
}
// 스크롤 움직임 여부
this.isActivatedScroll = true;
// 0.1초 후 다시 false -> 마우스 휠이 움직이는 순간 css효과를 주기위해 넣은 것!
setTimeout(() => (this.isActivatedScroll = false), 100);
// 스크롤 top 위치가 0 초과인 경우 true -> 스크롤이 0 이상인 경우 CSS 효과를 주기 위해 넣은 것!
scrollY > 0
? (this.isScrollMoved = true)
: (this.isScrollMoved = false);
},
});
}
// Y축 기반 페이지 비교 메소드
checkVisible(element: HTMLElement) {
// 엘리먼트의 크기와 뷰포트에 상대적인 위치 정보를 제공하는 DOMRect 객체를 반환
var rectangle = element.getBoundingClientRect();
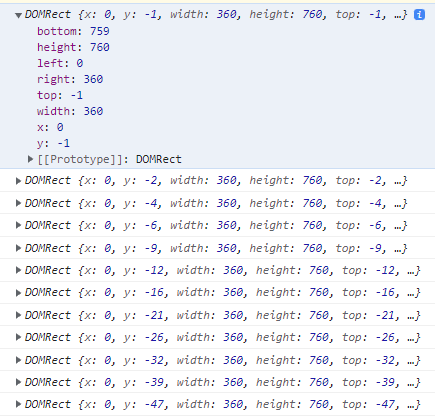
// 읽기 전용 속성인 Element.clientHeight은 엘리먼트의 내부 높이를 픽셀로 반환!
console.log(rectangle); // 결과는 아래 이미지 참조
// 현재 디바이스의 height 최대 값을 가져와 할당
// 특별한 경우가 아니면 두 값은 일치합니다.
var viewHeight = Math.max(
// clientHeight : 내부 여백(padding)을 포함하지만, 수평 스크롤바의 높이, 경계선, 또는 외부 여백(margin)은 포함X
document.documentElement.clientHeight,
// 말 그대로 window height 값
window.innerHeight
);
// 파라미터 템플릿의 bottom 과 top 을 기반으로 height 계산 후 Y축이 현재 페이지에 해당한다면 true 아니면 false return
// *2 및 Math.abs 처리 : 해당 페이지와 스크롤 위치가 정확히 일치 할 때가 아닌 어느정도 다음 페이지로 스크롤이 넘어갈 즈음에 다음 페이지로 인식하도록 수정
return !(rectangle.bottom * 2 < 0 || Math.abs(rectangle.top * 2) - viewHeight >= 0);
}
}9. 스크립트가 길어 상세한 설명은 코드 내에 주석을 참조해주세요.

<!-- middle -->
    <div class="flex flex-col items-center justify-center gap-4 px-8">
      <ng-container *ngFor="let dot of [].constructor(9); index as i">
        <!-- currentDot-->
        <img
          src="assets\icon\double_circle.svg"
          class="w-4 h-4"
          *ngIf="i === visibleIndex; else none"
        />
        // *ngIf else 사용 시 ng-template 태그 사용!
        <ng-template #none>
          <!-- dot -->
          <div class="bg-white/50 rounded-full w-1.5 h-1.5"></div>
        </ng-template>
      </ng-container>
    </div>
    <!-- bottom-->
    <div class="flex flex-col items-center justify-center gap-3 px-6 py-7">
      <div class="text-sm text-white">Scroll</div>
      <div>
        <app-icon
          src="assets\icon\mouse.svg"
          class="w-7 h-7"
          <!-- 스크롤 감지 상태에 따른 색상 변화 -->
          [ngClass]="{'text-primary': isActivatedScroll, 'text-white': !isActivatedScroll}"
        />
      </div>
    </div>
10. 위 이미지 사진을 구현한 html 템플릿입니다.
11. ngFor 반복문 실행
12. ngIf : 조건이 참인 경우 템플릿을 그립니다.
13. else none : <ng-template> 태그를 사용해야 연결할 수 있으며 태그내에 #none 를 명시하면 if else 와 동일한 로직으로 구현됩니다.
반응형
LIST
'IT' 카테고리의 다른 글
| Ionic Angular mobile side Menu / 아이오닉 앵귤러 모바일 사이드 메뉴 구현 예시 / ionic menu / ion-menu (1) | 2023.07.11 |
|---|---|
| Ionic angular router page changed scrollTop / 페이지 이동 시 최상단 고정 예시 (0) | 2023.07.10 |
| Tailwind CSS tracking pattern css 예시 / 조건 역정렬 (0) | 2023.07.08 |
| Angular Swiper silde custom 앵귤러 스와이프 슬라이드 커스텀 예시 (0) | 2023.07.07 |
| 브라우저 그림판 추천 / Erdiagram 그리기 좋은 사이트 (0) | 2023.07.07 |
'IT' Related Articles
more


