
Notice
Recent Posts
Recent Comments
Link
| 일 | 월 | 화 | 수 | 목 | 금 | 토 |
|---|---|---|---|---|---|---|
| 1 | ||||||
| 2 | 3 | 4 | 5 | 6 | 7 | 8 |
| 9 | 10 | 11 | 12 | 13 | 14 | 15 |
| 16 | 17 | 18 | 19 | 20 | 21 | 22 |
| 23 | 24 | 25 | 26 | 27 | 28 |
Tags
- 앵귤러 애니메이션
- 옵저버블
- Oracle LISTAGG 사용 예시
- summary
- 셀렉트박스 커스텀
- TAILWIND
- 호버
- angular button
- modal
- angular route
- prisma
- Ionic modal
- formgroup
- 모달
- angular animation
- Router
- Angular Router
- mysql if
- 스크롤 이벤트 감지
- flex-1
- 아이오닉 스크롤 이벤트
- ajax 사용 예시
- 검색
- angular modal
- 앵귤러 모달
- route
- ApexChart
- scroll
- egov spring ajax 사용 예시
- 스크롤 이벤트
Archives
- Today
- Total
깜놀하는 해므찌로
Angular Swiper silde custom 앵귤러 스와이프 슬라이드 커스텀 예시 본문
반응형
SMALL
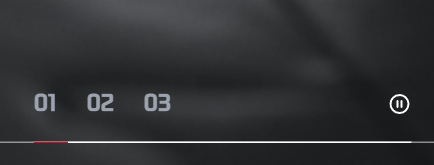
<!-- bar -->
<div class="absolute z-10 flex items-center py-4 gap-36 bottom-10">
  <div class="absolute bottom-0 flex w-full">
    <div #time class="z-10 h-px bg-primary"></div> 요기!!
    <div class="absolute w-full h-px bg-white"></div>
  </div>
  <!-- number -->
  <div class="flex gap-5">
    <div
      *ngFor="let number of [1,2,3]"
      class="text-sm text-gray-400 cursor-pointer hover:text-white hover:font-bold trasition-all SEBANG_Gothic_Bold active:scale-105"
      (click)="setSlide(number)"
    >
      0{{number}}
    </div>
  </div>
  <!-- play button -->
  <div class="flex" (click)="toggleAutoplay()">
    <app-icon
      [src]="isSwiperRunning ? 'assets/icon/pause.svg' : 'assets/icon/resume.svg'"
      class="w-4 h-4 text-white transition-all active:scale-110"
    />
  </div>
</div>
1. AfterView 시점에서 핸들링하기 위해 #item 명시
import { CommonModule } from '@angular/common';
import {
  AfterViewInit,
  CUSTOM_ELEMENTS_SCHEMA,
  ChangeDetectorRef,
  Component,
  ElementRef,
  HostListener,
  OnInit,
  ViewChild,
  signal,
} from '@angular/core';
import { register } from 'swiper/element/bundle';
import Swiper from 'swiper';
import { IconComponent } from '../../../components/icon/icon.component';

register();

@Component({
  selector: 'app-section1',
  templateUrl: './section1.section.html',
  styleUrls: ['./section1.section.scss'],
  schemas: [CUSTOM_ELEMENTS_SCHEMA],
  standalone: true,
  imports: [CommonModule, IconComponent],
})
export class Section1Section implements OnInit, AfterViewInit {
  @ViewChild('time') time: ElementRef<HTMLDivElement> | undefined;

  swiper!: Swiper;
  timeLeft = 0;
  isSwiperRunning: boolean = true;

  constructor() {}

  ngOnInit() {}

  ngAfterViewInit(): void {
    this.swiper = new Swiper('.section1', {
      autoplay: {
        delay: 5000,
        // 강제로 슬라이드 조작 후 슬라이드 자동 여부 onOff
        disableOnInteraction: false,
      },
      allowTouchMove: false,
      loop: true,
      // 슬라이드 작동 시작 시점, 새로운 슬라이드로 교체가 완료된 시점
      on: {
        autoplayTimeLeft: (swiper, timeLeft, percentage) => {
          this.timeLeft = 100 - Math.round(percentage * 100);
          if (this.time) {
            this.time.nativeElement.style.width = `${this.timeLeft}%`;
          }
        },
      },
    });
  }

  setSlide(slide: number): void {
    this.swiper.slideTo(slide - 1); // 슬라이드 이동
    this.swiper.slideReset(); // 슬라이드 리셋
  }

  toggleAutoplay(): void {
    if (this.swiper.autoplay.running) {
    // this.swiper.autoplay.pause() >> 원래는 pause 메소드를 쓰는데 앵귤러 16이라 그런지 모르겠는데 안 먹어서 프로퍼티 직접 값 할당
      this.isSwiperRunning = false;
      this.swiper.autoplay.running = false;
      this.swiper.autoplay.paused = true;
    } else {
      this.isSwiperRunning = true;
      this.swiper.autoplay.running = true;
      this.swiper.autoplay.paused = false;
      this.swiper.autoplay.resume();
    }
  }
}
2. view 페이지가 로드된 이후에 핸들링 하기 위해 AfterViewInit Hook 사용
3. viewChild 를 활용하여 time 태그에 접근
반응형
LIST
'IT' 카테고리의 다른 글
| Ion Scroll listen 활용 예시 / RxJS observable service (0) | 2023.07.09 |
|---|---|
| Tailwind CSS tracking pattern css 예시 / 조건 역정렬 (0) | 2023.07.08 |
| 브라우저 그림판 추천 / Erdiagram 그리기 좋은 사이트 (0) | 2023.07.07 |
| Angular screen size check 사이즈 체크 예시 (0) | 2023.07.06 |
| Angular Animation 앵귤러 애니메이션 효과 넣는 법 예시 (0) | 2023.07.05 |
'IT' Related Articles
more

